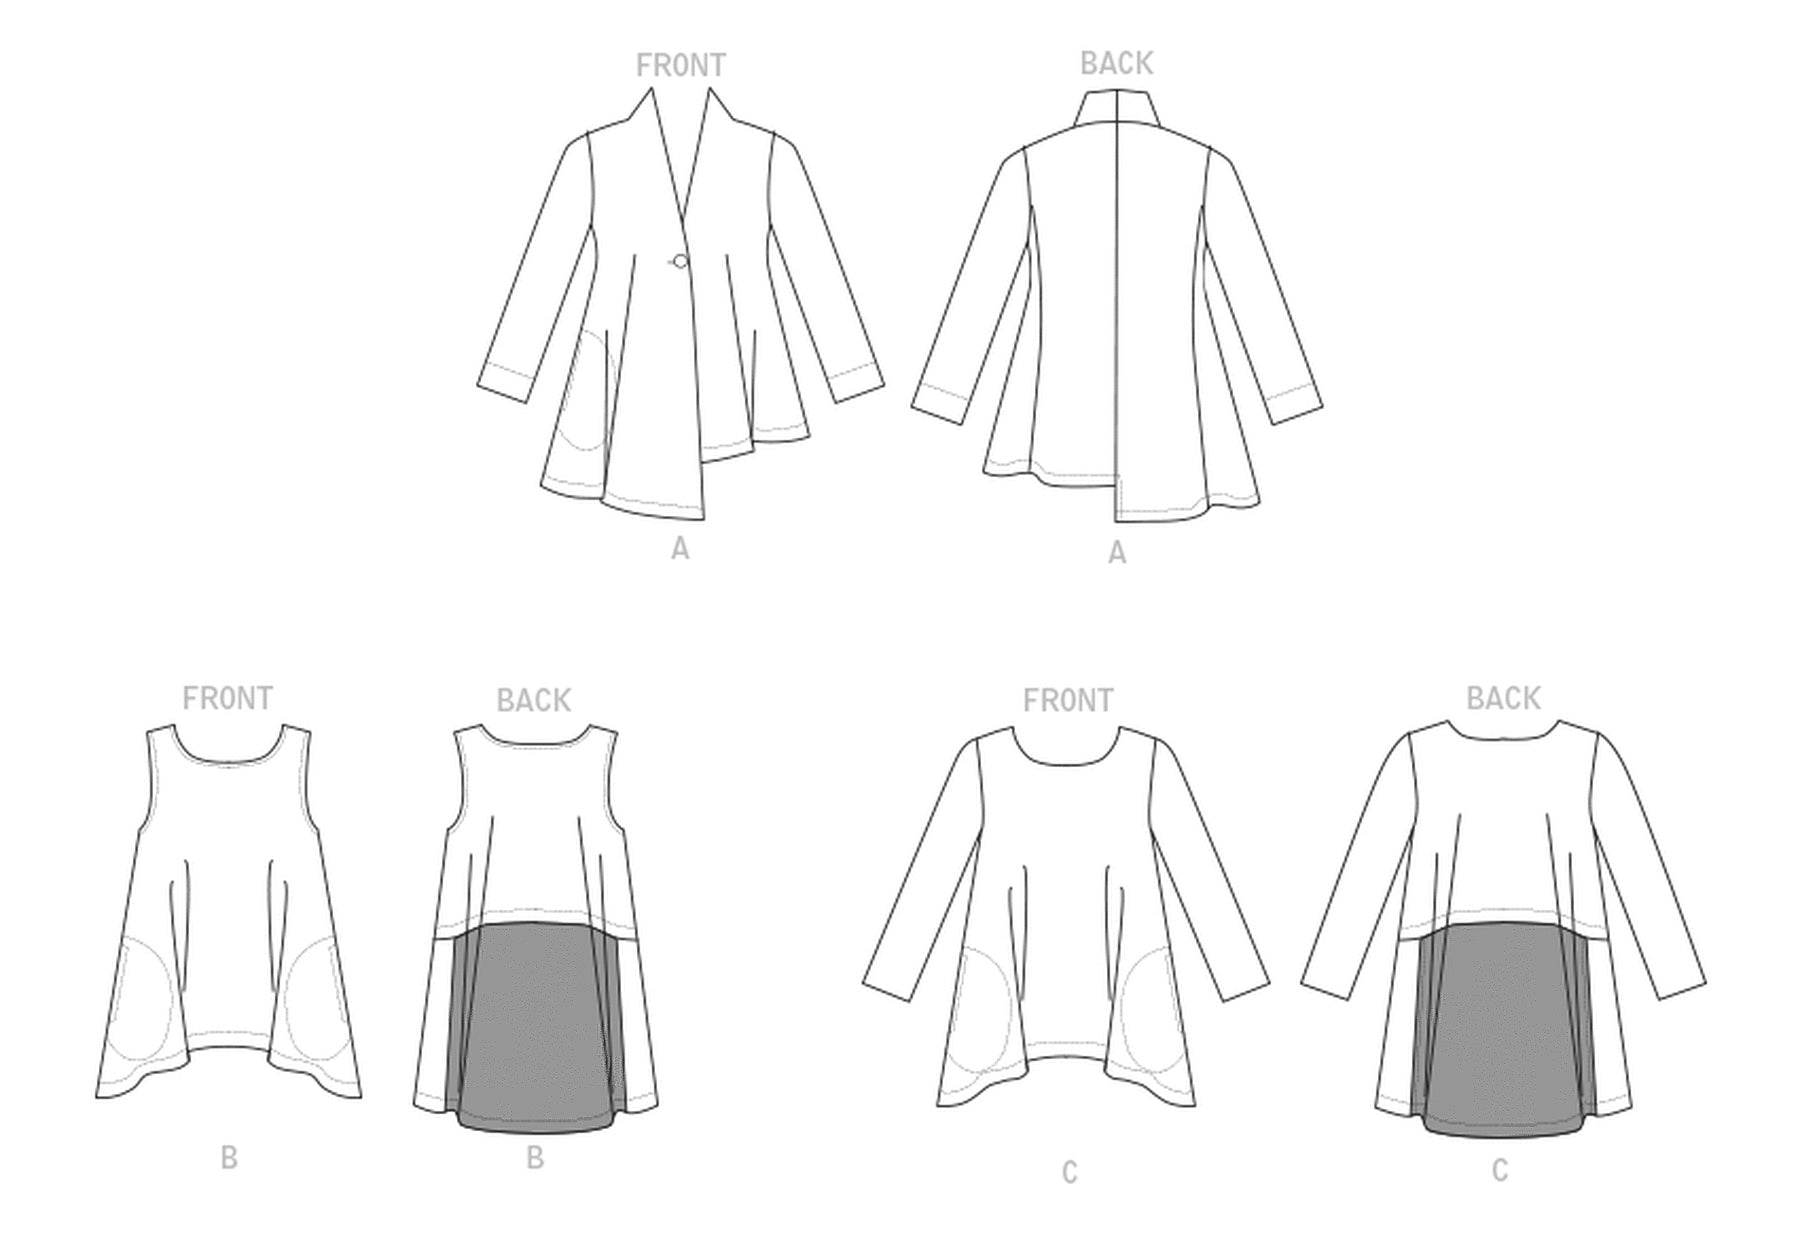
Designed for a light/mid/shirting weight woven fabric it works in weights from hanky linen to flannels depending on the desired drape.
Pockets are included in the pattern and are optional. On the pattern envelope the white version is hanky linen and has no pockets to avoid show through. The sleeveless blue version is a linen/cotton blend with pockets.
You will notice in the photo that the wrong side of the fabric is visible from the longer back side. If this is bothersome visually, choose a solid color, a yarn-dyed plaid, a check or stripe, a light jacquard or a printed fabric without a lot of contrast between the front and back sides.
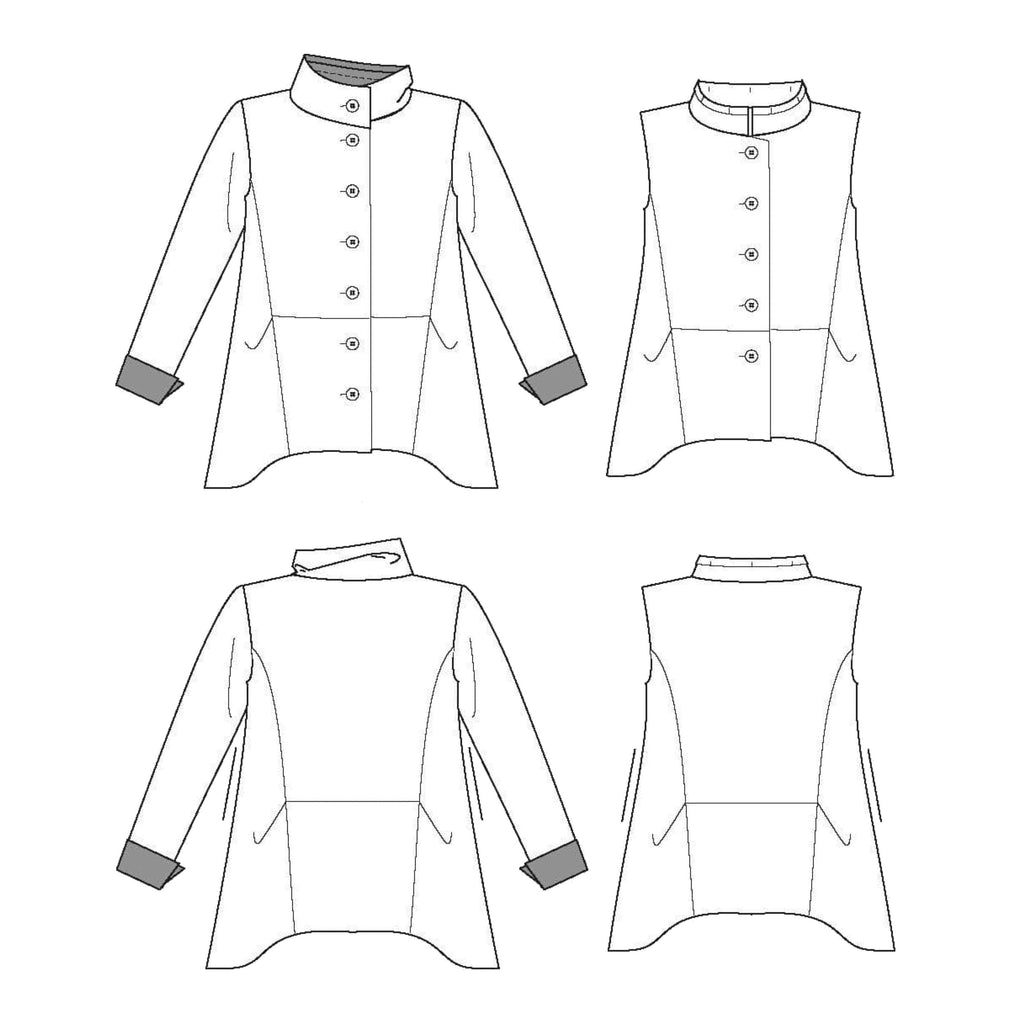
Note that the buttonholes are sewn off-set in the right front placket before the placket is stitched to the front and enclosed in the collar. The center front of the placket, lines up with the center front of the shirt, providing overlap for the buttons. The stitching line that holds the placket in place is offset on the right front and serves as a balance to the buttons, especially if stitched in a contrast color.
Fabric used: Mimi Japanese Cotton Seersucker for the main body, Right Bank Check for the contrast. French buttons stitched with red thread.
Originally the tunic was cut and stitched together in only the Mimi small checked seersucker. When I put it on the dress form to view I realized that a contrast check in the placket would make it more fun. By seeing a bit of the larger contrast check with the smaller it became clear that this was the way to go.
One cuff and the placket were carefully unstitched (using my favorite seam ripper). A new placket and new cuff were cut from the contrast check, stitched together and added. With red stitches in the buttons the shirt became just right. A few embroidery stitches may be added as well…
For my next version I’m going to eliminate the buttons and placket, straighten the center front at the lower edge, add seam allowances to make it a seam — with a simple facing leaving room for my head — and have a tunic/dress.
B6995 is a shirt/tunic that can be designed and re-designed endlessly. This gingham check version is the first of many iterations that I can imagine.
Happy sewing!
Uses a Japanese linen on one side and a Japanese cotton/wool on the other.
Made in Spring 2021 and inspired by a painting I purchased from Miles Frode, (the talented son of Diane Ericson.)
Made in Fall 2021, inspired by a small ’50’s vintage painting I purchased in Paris at the flea market.
Made in Winter 2024 and inspired by Marcy’s friend Amy who wanted to hit the refresh button on her bedroom decor.
Takes about 1 yard per standard size pillowcase. Katherine is stitching pot holders from any scraps.
Contemporary Bar Jackets on the Dior website
If you are inspired to make your own version, Vogue 2018 is inspired by the Bar Jacket in a well done modern interpretation.
*The dye lot on our current stock of Blue Moon Cotton Patchwork is slightly different from that of the Dark Blue Moon Cotton Patchwork used on this garment. The blue in our current stock tends toward cobalt rather than navy.
Cutting the front and the hood: The pattern pieces were laid out so that the already finished/selvedge edges of the Kantha cloth were used for the front center seamline and also for the finished edge of the hood. No tie was added to the hood.
Seams: I wanted the jacket to be reversible. First all the seams were serged and pressed as flat as possible. Then I zig-zagged over the seams to stabilize and hold them flat. I used a dark blue thread in the needle and a paler blue in the bobbin, stitching with the right side on top. The colors/patterns in the design are random enough that the seams done this way virtually disappear.
Depending on your machine situation you may want to experiment with scraps for a seam finishing technique that works for you. It will be different if you want the hoodie to be reversible. Everything else was finished with hand stitching — hems, zipper and pockets.
Hems: Since the Kantha has 2 layers of fabric I gently pulled them apart at the hem and turned each side under, slip stitching them together. Later decorative hand stitching was added to finish.
Zipper: The zipper was stitched on by hand, mirroring the original finished edge stitching and done so it shows on both sides of the jacket. I used a YKK #5 molded plastic reversible jacket (separating) zipper from Wawak.com. The pull on this zipper flips from one side to the other so the zipper works when either side of the fabric is on the outside. The zipper was laid in place underneath the right side of the finished edge of the fabric. I pinned one side of the zipper in place and experimented with double sided tape to hold the other side as I stitched. Either method works but the double sided tape holds with more stability and you don’t run the risk of getting poked.
Pockets: Because the jacket is reversible I had to think about how to add the pockets. I decided that what would work would be to have one usable pocket that would sit on the right front side irregardless of whether the patched Kantha/‘front/right’ side or the whole cloth/‘back/wrong’ side was exposed.
All pocket edges were first finished with slip-stitching as explained above in ‘Hems’. The curved opening edge was stitched with the decorative hand stitching before it was attached to the body of the jacket. Then, the edges of the pockets were attached to the jacket with the decorative hand stitching.
Best to stitch the pockets in place after the zipper is installed to make sure the pockets line up correctly. Some of us learn the hard way.
Hand stitching: I used a simple tacking stitch done in both directions; stitching first one way and then the other. First set of stitches go this way ////, then the second set of stitches goes the opposite way \\. When they overlap and meet at the ‘points’ it ends up looking like this /\/\/\/\/\/\/. This is similar to the stitching that they use in India to finish the edges of the Kantha cloth. I find hand stitching a contemplative experience — I love to do it.
Knits: Use a stable mid-weight knit like a Ponte, Fleece or French Terry. If this is your first knit project I recommend the Ponte as the edges won’t roll on you as you sew.
If the edges of your fabric roll so much they are making you crazy, simply cut the seams a bit larger and pin the pieces together in the seamline. Since knits don’t ravel the seams don’t need to be finished. You can leave the hem/pocket/sleeve edges unfinished so that the rolling of the knit becomes a design element.
This hoodie is designed to be oversized so a drapey knit works nicely. If you want a closer line use a smaller size than normal. Be sure to fit before you cut.
Zipper: Sometimes it is challenging (impossible) to find a zipper the exact length of your hoodie in the right color. If this happens use the longest separating zipper you can find that is shorter than the finished front center measurement and install it so the top is flush with the neck opening. If you look closely at view B on B6863 you hardly notice that the zipper doesn’t reach all the way to the hem like it (fortuitously) did on view A. The zipper in view A is stitched on the outside of the hoodie, utilizing the color contrast as a design element.
The zipper in view B is stitched to the inside of the hoodie. To do this I face the zipper teeth towards the side seam on the seamline, with the right/front side of the zipper to the right side of the fabric. Then stitch close to the teeth on the back/wrong side of the zipper. Next, fold the zipper to the back on the seamline, press and top stitch on the right/front side and you will have a beautiful clean finish. Again, I use double faced tape to hold the zipper in place so it doesn’t shift. I always pin the zipper in place firsthand check to make sure it is going the right way before I apply the tape — I’ve ripped out too many zippers going in the wrong direction in the past to avoid this step!
Hoodie Tie Opening — I use a small buttonhole for the tie opening. Stabilize with a scrap of interfacing and stitch this in place. Easier to cut open before you stitch the tie channel in the front of the hood.
Hoodie Tie — If you can find cording to match the color of your hoodie, great. If not you can get creative. View A uses a 3/4”piece of striped knit, cut vertically so it curls in on itself, knotted at the ends. A strip of knit makes a great tie. View B uses a piece of ribbon, folded and stitched together.
My first prototype used a panel print in a mid weight stretch cotton.
All last fall and winter, the one piece I kept thinking about and wanting in my wardrobe was a black corduroy jacket. Wished for it in Paris last fall and again back home last winter. Making this jacket was a pleasure and sometimes a struggle.
The tunic-top can be made sleeveless or with sleeves and features a lower back panel that peeks out from beneath the asymmetrical back hem on the cardigan. The optional decorative ‘patch’ on the back can be cut entirely from the pattern piece or sewn on top, and can be a knit, a mesh, lace or woven. Both top/tunic and cardigan have pockets. On the blue and white versions I used panel prints as the main pattern piece. On the green version, I used a mesh stitched on top of the knit.
The asymmetrical cardigan closes with one button, has a simple shawl collar cut all in one with the front, and works well worn open as well as closed. You could make the cardi symmetrical by simply cutting either left or right side in a double thickness.
The boldness of the red and black of Crimson Baby Buffalo Check Flannel provides the right juxtaposition to the small scale of Black and White Mini Houndstooth Flannel and makes a perfect contrast in color, balance and proportion. Cut the checked fabric separately to match the checks. Each side has one pocket in the contrast fabric to balance the inside of the hood which is exposed when worn. Cut the identical fabric pockets on the bias to provide design variation and solve matching issues.
Knits with good stretch and recovery: rayon/lycra or cotton/lycra jersey, poly ITY knits, nylon/lycra knits, stretch lace or mesh.
For the pattern envelope garments I used a stretch woven in a light blue and white check, and a black and white ponte for the dresses and a rayon/lycra knit for the t-shirt
Before sewing be sure to do your usual fitting and alterations, then lay out the pattern pieces as they will go together to see how the pieces will fit.
Mark and make note of matching points, notches and dots. The photos below show my working pattern which has no seam allowances.
Start by assembling the back as it will give you a good idea of how the pieces go together.
To test the first prototype for myself, I used one of our French Digital Cotton/Elastine knits, and used a bamboo/spandex stripe for the t-shirt.